Photoshop Composites
|
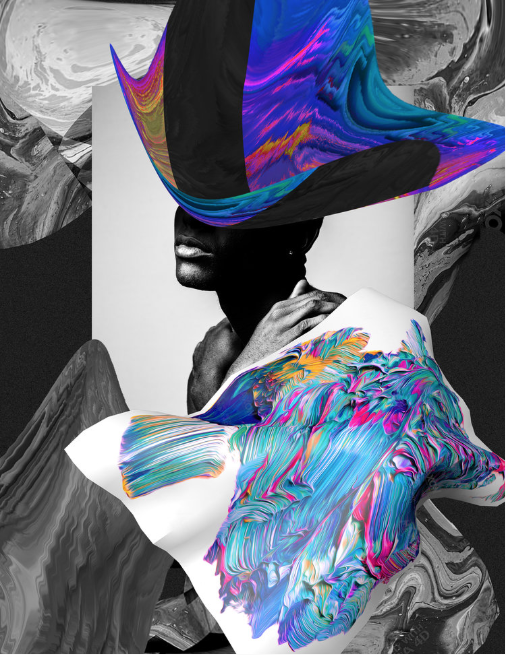
Photo composites have been around as long as photography itself. In the days of film, when they were usually known as photomontages, composites were used for both commercial and fine-art imagery. The same is true today; for example, check out Temi Coker’s beautiful blending of photography and graphics to the right.
Thanks to digital photography and Adobe Photoshop, you no longer need sharp blades and glue to create your own photocomposites. In the 60-second video and step-by-step text instructions below, you'll learn how to combine photos to create a new reality. You will create two different documents:
|
images created by Temi Coker
|
Files to Download
|
| ||||||||||||
Step-by-Step Instructions (Mac Instructions)
- Start Photoshop and open the downloaded file "model_157142297.psd," then drag the downloaded file "bettafish_176045380.psd" into the open Photoshop document. The fish will appear on its own layer.
- Select the Move (v) tool and look at the Options bar. If Show Transform Controls isn't checked, go ahead and check it now.
- With the fish layer active, click Command-T and hover your cursor just outside one of the fish's corner controls. You can drag to rotate it and move your cursor in any direction to place the fish where you want it.
- Right-click on the fish and choose Warp. Experiment with dragging to reshape the fish into something like a headdress. When you're satisfied, hit Return.
- Now it's time to blend the two layers so they look like a cohesive single image. Select the fish layer and click the Add layer mask icon in the Layers panel and click the mask thumbnail. (That's the white square icon.)
- Choose the Brush (b) tool and set the foreground color to black. To uncover a portion of the model's profile, paint over the areas of the fish you want to hide. You can change your brush's size and softness in the Options bar. Tip: Layer masks are a better choice than the Erase tools because they're non-destructive. If you make a mistake while painting a mask, simply switch the Brush color to white and paint again.
- Once again, drag the "bettafish_176045380.psd" file into the open Photoshop document, and follow the steps above the change its size and position.
- To complete the composite, add a layer mask to the second fish and again use a Brush set to conceal parts of the fish.


